Absolutely minimal Android project
I’m a big fan of the command line. I spend most of my programming time in the Integrated Development Environment of tmux and Vim. When I started dabbling in Android development, I feared I would be stuck in the IDE all the time, wrangling some binary file formats using graphical click-and-play tools, with little to no understanding of what goes behind the scenes. I was delighted to learn otherwise.
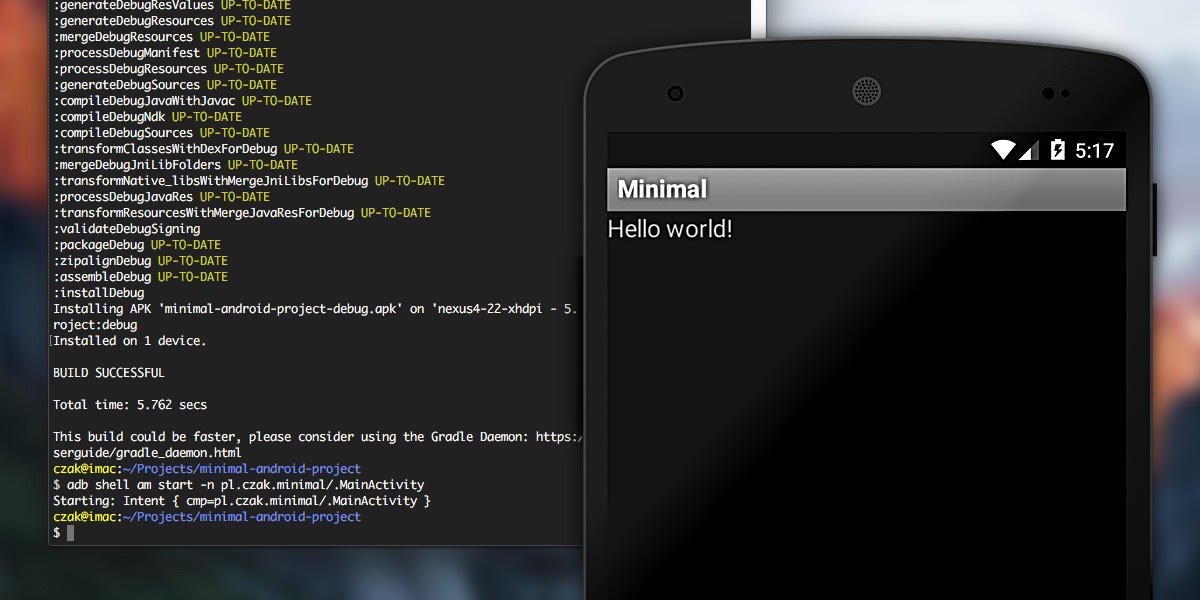
In order to build a “Hello world” project for Android, you need two text files. One will be an XML. The other - a Java source file. That’s it. Then you build and install that project on your phone with a single command.
I’m not here to sneer at a good IDE. Despite my fears, Android Studio is proving to be a very comfortable tool. As a newcomer to Android, I can see great value in the instant feedback, code completion and all the suggestions it provides. They make exploring the APIs this much easier. But an IDE, no matter how well thought out, can make us lazy. It can shield us from what it really means to place a button in the UI designer or what really happens when I press Build. I think it’s beneficial to look behind the curtains from time to time.
Which is why I ventured to find the Absolutely minimal Android project.
Show me the files already!
In the Android API Guides we read:
Every application must have an AndroidManifest.xml file (with precisely that name) in its root directory.
Say what you will about XML, at least I can edit it in any text editor. And this one isn’t even long:
<?xml version="1.0" encoding="utf-8"?>
<manifest xmlns:android="http://schemas.android.com/apk/res/android"
    package="pl.czak.minimal">
    <application android:label="Minimal">
        <activity android:name="MainActivity">
            <intent-filter>
                <action android:name="android.intent.action.MAIN" />
                <category android:name="android.intent.category.LAUNCHER" />
            </intent-filter>
        </activity>
    </application>
</manifest>
We need the <manifest> with one <application> . And that <application> needs one <activity>. For our purposes the entire <intent-filter> element can be considered boilerplate. It defines MainActivity to be the MAIN activity of our app, accessible by an icon in the LAUNCHER.
Our <manifest> root element needs a package attribute. The package name should follow a Java-style naming convention and the install will fail if it doesn’t contain at least one dot. Note however that this package name does not need to match the package name of our Java classes. In fact, we could have all the Java classes contained in the a.b.c package and specify x.y.z for this attribute.
By using a matching package name however, we can use the shorthand "MainActivity" name to refer to the pl.czak.minimal.MainActivity class. Here’s the class in its entirety:
package pl.czak.minimal;

import android.app.Activity;
import android.os.Bundle;
import android.widget.TextView;

public class MainActivity extends Activity
{
    @Override
    public void onCreate(Bundle savedInstanceState) {
        super.onCreate(savedInstanceState);

        TextView label = new TextView(this);
        label.setText("Hello world!");

        setContentView(label);
    }
}
If you’ve ever touched Android, this will be nothing new. And even if you’re seeing it for the first time, this should be clear anyway. A simple Activity with a simple TextView taking up its entire content.
Let’s build it
Remember how I said two text files? Well it wasn’t technically a lie. But in order to build and install this project right now, we would need to whip out javac, aapt, dx, jarsigner and possibly a few more command line tools I’ve missed. Each with its own arguments and switches. Surely a subject worth exploring on its own…
(UPDATE: Since writing this post, I have indeed explored this subject in more detail and wrote about it here)
But for now, let’s just add a third file - build.gradle:
buildscript {
    repositories {
        jcenter()
    }
    dependencies {
        classpath 'com.android.tools.build:gradle:1.5.0'
    }
}

apply plugin: 'com.android.application'

android {
    compileSdkVersion 23
    buildToolsVersion '23.0.2'
}
Gradle is the now-default build system for Android, using perfectly legible Groovy syntax to configure the builds. If we stick to the defaults, we can keep it as simple as the one above. The buildscript part is boilerplate. Gradle does not come with Android support out of the box, so this block sets up the Gradle Android plugin.
What matters to us are compileSdkVersion and buildToolsVersion. These need to match the SDK and build tools versions you have available in your Android SDK installation.
With build.gradle in place, we can finally execute:
$ gradle installDebug
$ adb shell am start -n pl.czak.minimal/.MainActivity
If successful, the above commands will build, install, and run the project on all devices - or emulators - currently accessible to adb.
Some assumptions
In order to work correctly, the process will require a tiny bit of preparation.
JAVA_HOMEshould be set up. If you havejavain your path, you’re most likely good to go.ANDROID_HOMEneeds to point to the root of your Android SDK installation.- You need to have the
gradleexecutable in your path.
Step 3 might be a bit controversial. The recommended way to work with Gradle is to use the Gradle Wrapper and have it included with your project. Android Studio does this for you automatically and you may never see the standalone executable. But it is available, can be easily downloaded and installed. And after all, we didn’t come here to add more files but rather to keep them away.
One more thing worth pointing out is the directory structure. We can keep build.gradle to an absolute minimum if we stick to the defaults expected by the Gradle Android plugin. One of those defaults is the organization of our source files. The manifest file should be located at src/main/AndroidManifest.xml and the Java source files in appropriate package subdirectories under src/main/java/.
This leads us to the following source directory:
project
 ├── build.gradle
 └── src
     └── main
         ├── AndroidManifest.xml
         └── java
             └── pl
                 └── czak
                     └── minimal
                         └── MainActivity.java
Observations
- Since we dropped all possible resources from the project, the
Rclass isn’t generated at all. Makes sense - no resources, no identifiers. android:iconis not specified for the<application>, and yet the app shows the default icon in the launcher. I believe the standard system drawableandroid.R.drawable.sym_def_app_iconis used in this case.android:labelcould also be dropped, but the labels would default to rather unreadable:pl.czak.minimallabel for<application>pl.czak.minimal.MinimalActivitylabel for<activity>
- Skipping an explicit
minSdkVersiondefaults to1. Which means “the app is compatible with all versions of Android”. Which also means “use the ugly basic theme”. - Skipping an explicit
versionCodedefaults to-1. Seems like a reasonable default as that is not a value you would choose consciously. And as soon as you start versioning your app, any value will be an upgrade over-1.
Final words
What started as a learning exercise, turned into a helpful project. Whenever I want to quickly verify an idea or test a new API, I just copy the repository, edit the source and run.
I’m looking forward to any comments. Can we trim it down even more? See the minimal-android-project on GitHub.
In a future article I want to explore the specific tools which make up the Android SDK. Gradle is cool and all, but you know… we need to go deeper.
UPDATE: For the article I hinted at here, see Jack, Jill & building Android apps by hand.