Single-file Cocoa application with Swift
Coming from a Ruby background, Xcode - and IDEs in general - never really feels like home to me. I often miss Vim and hope to get as much done in the terminal as possible.
Working in the IDE, I often feel there’s a lot hidden out of sight. Hidden behind config files, property lists, some unknown IDE defaults. A lot I don’t know and a lot that gets done for me rather than by me. Surely there’s some benefit to that. But the downside is that the inner workings of an application can be poorly understood.
That’s why sometimes I like to strip away the layers, drop all the config files and attempt to build stuff “by hand”. It might not always make sense, but invariably I learn something in the process.
Does it make sense to build Cocoa apps without Xcode? Without Interface Builder? For any non-trivial application, the answer is most probably “no”. But it doesn’t hurt to try.
Swift
To a Rubyist, Swift can actually feel a lot like home. Apart from the language itself, there’s a perfectly useful REPL and the swift command runs your code just like ruby or python would.
Thus I’ll be presenting a few examples of single-file Cocoa applications. Every code block you see is a self-contained application. Save it in a .swift file and run:
$ swift filename.swift
All the examples are short and meant only to present basic concepts.
Case 1. Status item-based application
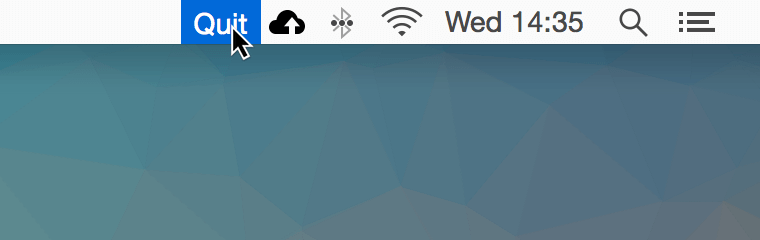
Of all the examples here, this one may actually be the most practical. Constructing an NSStatusItem is a trivial matter, and in a few lines we can even make it react to mouse click and terminate cleanly.
import Cocoa

NSApplication.sharedApplication()

let statusItem = NSStatusBar.systemStatusBar().statusItemWithLength(NSVariableStatusItemLength)
statusItem.title = "Quit"
statusItem.action = "terminate:"

NSApp.run()
And voilà!
Worth noting:
NSApplication.sharedApplication()must be called first. It initializes the application instance. It also returns the instance, but I’m using the globalNSAppconstant to refer to it later.NSApp.run()starts the application’s main event loop and never returns.
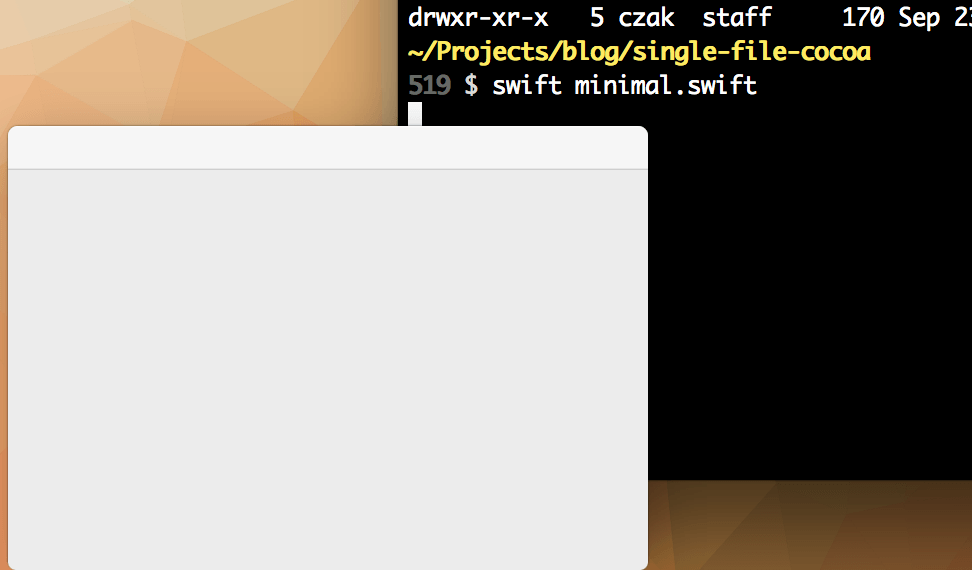
Case 2. Minimal windowed application
import Cocoa

NSApplication.sharedApplication()

let window = NSWindow(contentRect: NSMakeRect(0, 0, 320, 200),
                      styleMask: NSTitledWindowMask,
                      backing: .Buffered,
                      `defer`: true)
window.orderFrontRegardless()

NSApp.run()
This places a window (mode 13h heh - get it?) in the bottom left corner of the screen and enters the application’s main event loop. But there’s nothing to handle any events (like… uhm quitting), the application doesn’t appear in Dock and it doesn’t really activate properly.
Notes:
- Modern Xcode templates do away with the
NSApplicationcode and instead rely on the@NSApplicationMainattribute. - The backticks for
deferare required since Swift 2.0 now contains thedeferkeyword.
Control-C in the terminal to quit and let’s make the app a slightly better OS X citizen.
Case 3: Fully activated Cocoa windowed app
We need two more steps for the application to activate correctly on launch.
import Cocoa

NSApplication.sharedApplication()
// 1. Configure as a regular app, appearing in Dock and (possibly) having UI
NSApp.setActivationPolicy(.Regular)

let window = NSWindow(contentRect: NSMakeRect(0, 0, 320, 200),
                      styleMask: NSTitledWindowMask,
                      backing: .Buffered,
                      `defer`: true)
window.orderFrontRegardless()

dispatch_async(dispatch_get_main_queue()) {
    // 2. Make it the active app
    NSApp.activateIgnoringOtherApps(true)
}

NSApp.run()
Notes
- For
NSApp.activateIgnoringOtherApps(_:)to work correctly, it needs to be run after the main event loop is started. This is achieved by deferring it to the main dispatch queue. The queue will be drained byNSApplicationafter enteringNSApp.run().
Case 4. Closing the app and cleanup
At this point it makes sense to create an object to act as the application delegate. First, it will allow us to drop dispatch_async and make use of the application lifetime events for our job. Second, we can easily start making the app more useful.
import Cocoa

class AppController: NSObject, NSApplicationDelegate {
    var mainWindow: NSWindow?

    func applicationDidFinishLaunching(aNotification: NSNotification) {
        let window = NSWindow(contentRect: NSMakeRect(0, 0, 320, 200),
                              styleMask: NSTitledWindowMask | NSClosableWindowMask,
                              backing: NSBackingStoreType.Buffered,
                              `defer`: true)
        window.orderFrontRegardless()
        self.mainWindow = window

        NSApp.activateIgnoringOtherApps(true)
    }

    func applicationShouldTerminateAfterLastWindowClosed(app: NSApplication) -> Bool {
        return true
    }
}

NSApplication.sharedApplication()
NSApp.setActivationPolicy(.Regular)

let controller = AppController()
NSApp.delegate = controller

NSApp.run()
This is starting to look more and more similar to what Xcode creates for us.
- An
NSApplicationDelegate-compliant object is assigned to beNSApp.delegate - Additional initialization is implemented in the app lifetime hooks.
- By making the window
NSClosableWindowMaskand implementingapplicationShouldTerminateAfterLastWindowClosed, we can even terminate cleanly.
Wrapup
Beyond this last example, I believe we’re entering Xcode territory. Sure, all Cocoa UI can be constructed by code, but that wasn’t the point here. I wanted to see what kind of magic Xcode does for me behind the scenes when constructing a basic Cocoa application. I’m pleasantly surprised to see it’s not really that much.
Resources
For further information on these concepts, see the following resources: